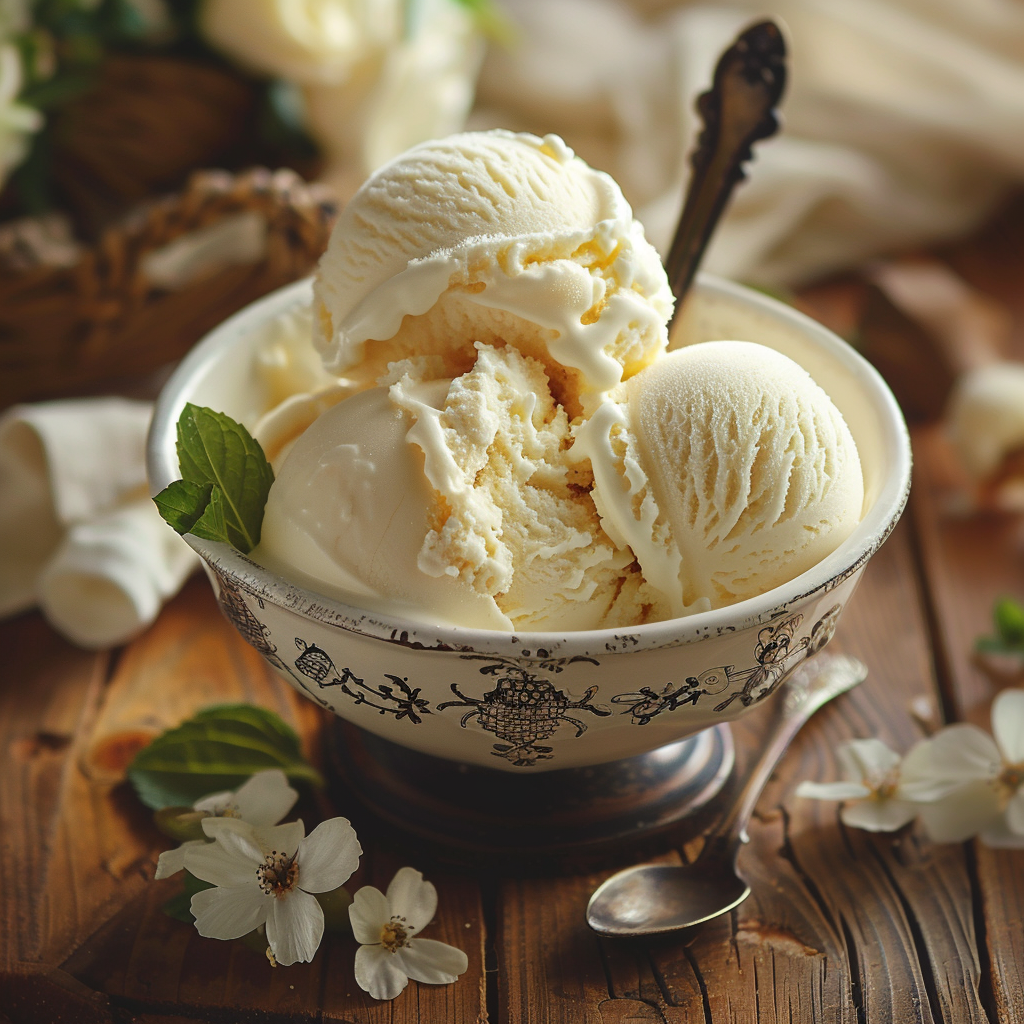
There’s a special kind of comfort that comes with a scoop of genuinely old-fashioned vanilla ice cream. Forget the overly sweet, artificially flavored versions often found in stores. This recipe brings you back to the simple, pure taste that made this classic dessert a beloved treat for generations. Made with just a few quality ingredients, this homemade vanilla ice cream is creamy, rich, and utterly satisfying. It’s the perfect base for your favorite toppings or simply to be enjoyed on its own, evoking cherished memories of simpler times and grandma’s kitchen.
Why This Recipe Works
This old-fashioned vanilla ice cream recipe works because it prioritizes the quality of its simple ingredients and employs a classic custard base. The use of egg yolks creates an incredibly smooth and luscious texture that’s hard to achieve with simpler, no-cook ice creams. The subtle sweetness of sugar and the pure aroma of real vanilla extract are allowed to shine through, creating a sophisticated flavor profile.
It’s a recipe that rewards patience and gentle handling. When made correctly, the custard base thickens beautifully, and when churned and frozen, it transforms into a delightful treat. This is the kind of dessert that feels both special and incredibly comforting, perfect for cooling down on a warm day or as a sweet ending to any meal.
Recipe Overview
| Prep Time | 25 minutes |
|---|---|
| Cook Time | 10 minutes |
| Chill Time | 4 hours minimum |
| Freeze Time (Churning) | 20-30 minutes |
| Total Time | Approximately 5 hours |
| Servings | 6-8 servings |
| Difficulty | Intermediate |
| Category | Dessert |
| Cuisine | American, Grandma-style |
| Best For | Summer treats, special occasions, simple homemade enjoyment |
Ingredients
The beauty of this old-fashioned vanilla ice cream lies in its minimal, high-quality ingredients, allowing the pure flavors to sing. Gather these items to create your luscious homemade treat.
| Ingredient | Quantity | Notes |
|---|---|---|
| Heavy Cream | 2 cups | Start with good quality, cold heavy cream. |
| Whole Milk | 1 cup | Using whole milk contributes to richness. |
| Granulated Sugar | 3/4 cup | Adjust to your preferred sweetness. |
| Egg Yolks | 5 large | These create the creamy custard base. |
| Vanilla Extract | 2 teaspoons | Use pure vanilla extract for the best flavor. |
| Salt | 1/8 teaspoon | Enhances all the other flavors. |
The key to an exceptional vanilla ice cream is the balance between the creamy fats from the heavy cream and egg yolks, the sweetness from the sugar, and the aromatic depth of the vanilla. If you don’t have pure vanilla extract, you can use a vanilla bean, scraping the seeds into the milk mixture while it heats; you’ll need about 1 vanilla bean. The 1/8 teaspoon of salt might seem small, but it plays a crucial role in making the vanilla flavor pop and preventing the ice cream from tasting flat.
Step-by-Step Instructions
Follow these steps carefully to create a wonderfully rich and smooth old-fashioned vanilla ice cream.
Prepare the Base
- In a medium saucepan, combine the heavy cream, whole milk, and salt.
- Heat the mixture over medium heat until it is steaming and small bubbles form around the edges. Do not let it boil.
- While the dairy heats, whisk together the egg yolks and sugar in a separate medium bowl until pale yellow and slightly thickened.
Temper the Eggs
- Once the cream mixture is hot, slowly ladle about 1 cup of the hot liquid into the egg yolk and sugar mixture, whisking constantly. This is called tempering and gently warms the eggs to prevent them from scrambling.
- Gradually add another 1/2 cup of the hot liquid while continuing to whisk vigorously.
- Pour the tempered egg mixture back into the saucepan with the remaining hot cream mixture.
Cook the Custard
- Cook the custard over low to medium-low heat, stirring constantly with a wooden spoon or rubber spatula.
- Continue to cook until the custard thickens enough to coat the back of the spoon. You should be able to draw a line through the custard on the spoon with your finger, and the line should hold its shape. This usually takes about 5-8 minutes. Do not let it boil, or the eggs will curdle.
- Remove the saucepan from the heat immediately.
Chill the Base
- Stir in the vanilla extract.
- Strain the custard mixture through a fine-mesh sieve into a clean bowl. This ensures a perfectly smooth ice cream without any cooked egg bits.
- Cover the bowl with plastic wrap, pressing the wrap directly onto the surface of the custard to prevent a skin from forming.
- Refrigerate the custard base for at least 4 hours, or preferably overnight, until it is thoroughly chilled. This is a crucial step for proper churning.
Churn and Freeze
- Pour the chilled custard base into your ice cream maker and churn according to the manufacturer’s instructions. This typically takes 20-30 minutes, or until the ice cream reaches a soft-serve consistency.
- Transfer the churned ice cream to an airtight container.
- Press a piece of parchment paper or plastic wrap directly onto the surface of the ice cream in the container to prevent ice crystals from forming.
- Freeze for at least 2-4 hours until firm.
Serve
- Let the ice cream soften at room temperature for a few minutes before scooping for the best texture.
- Serve as is or with your favorite toppings.
Granny Tips for Perfect Results
Follow these little bits of wisdom for the best old-fashioned vanilla ice cream every time.
- Use Quality Vanilla: The star of this ice cream is vanilla. Pure vanilla extract offers a beautiful floral note, but using a vanilla bean scraped into the milk mixture will give you an even more intense, complex flavor.
- Don’t Rush Chilling: A thoroughly chilled base is essential for smooth ice cream. If the base is too warm, it will churn slowly, resulting in icy crystals rather than creamy texture. Overnight chilling is ideal.
- Temper with Care: When tempering your eggs, add the hot dairy very slowly while whisking constantly. This gradual process is key to avoiding scrambled eggs and achieving a silky custard.
- Strain for Smoothness: Always strain your custard base through a fine-mesh sieve. This catches any small bits of cooked egg or undissolved sugar, ensuring a perfectly smooth final product.
- Proper Freezing: Pressing parchment paper directly onto the surface of the ice cream before freezing helps prevent ice crystals, keeping your ice cream smooth and creamy.
- Patience for Scooping: Let the ice cream sit at room temperature for 5-10 minutes before scooping. This softens it just enough to make scooping easy and reveals its true creamy texture.
Common Mistakes to Avoid
Even simple recipes can have little pitfalls. Here’s what to watch out for to ensure your old-fashioned vanilla ice cream turns out perfectly creamy.
- Mistake: Boiling the Custard. Overheating the custard can cause the eggs to scramble, resulting in grainy ice cream and a less smooth texture. Cook gently over low heat, stirring constantly, until it just coats the back of a spoon.
- Mistake: Not Chilling the Base Enough. A warm base won’t churn properly in an ice cream maker. This leads to a coarser texture because the ice cream freezes too quickly and forms large ice crystals. Ensure the base is thoroughly chilled, ideally overnight.
- Mistake: Using Low-Fat Dairy. While you can make ice cream with lighter milk, using whole milk and full-fat heavy cream is crucial for achieving that classic, rich, old-fashioned texture and mouthfeel. Lighter versions can be icy.
- Mistake: Skipping the Strain. Even with careful tempering, tiny bits of cooked egg can form. Straining the custard before chilling is a simple step that guarantees a super smooth ice cream.
- Mistake: Over-Churning. Churn the ice cream only until it reaches a soft-serve consistency. Over-churning can incorporate too much air or make it too hard before freezing, affecting the texture.
Variations and Substitutions
While classic vanilla is divine, you can easily adapt this recipe to suit your tastes and needs.
| Variation or Ingredient | Substitution | Result |
|---|---|---|
| Vanilla Flavor | 1 vanilla bean (scraped seeds) | More intense vanilla flavor with visible seeds. |
| Dairy-Free | Use full-fat coconut cream instead of heavy cream, and a rich unsweetened plant-based milk (like cashew or oat) instead of whole milk. Use 4 large yolks from duck eggs or skip yolks and use 1/4 cup cornstarch or tapioca starch mixed with a bit of the plant milk to thicken. | A creamier, dairy-free version, though coconut flavor might be subtle. Starch-thickened bases may have a slightly different texture. |
| Less Sweet | Reduce sugar to 1/2 cup. | A less sweet, more subtle vanilla flavor. |
| Richer Texture | Increase heavy cream to 2.5 cups and decrease milk to 0.5 cup. | An even creamier, denser ice cream. |
Serving Suggestions and Pairings
Old-fashioned vanilla ice cream is incredibly versatile and pairs beautifully with many things.
Serve scoops of this creamy vanilla ice cream slightly softened for the easiest scooping and best texture. It’s perfect on its own during a warm afternoon, as a comforting dessert after a family meal, or as a special treat on holidays. Consider topping it with fresh berries, a drizzle of chocolate sauce, warmed caramel, or chopped nuts. It’s also a classic accompaniment to warm apple pie, brownies, or a slice of moist cake. For an extra special touch, a few fresh mint leaves or a sprinkle of cinnamon can enhance its flavor.
Storage and Reheating
Proper storage is key to enjoying your homemade ice cream at its best.
| Method | Duration | Instructions |
|---|---|---|
| Home Freezer | 1-2 weeks | Store in an airtight container. Press parchment paper or plastic wrap directly onto the surface of the ice cream before sealing the lid to prevent ice crystals. For best results, consume within 2 weeks. |
| Refrigerator | Not Recommended | Ice cream will melt and is not safe to store at room temperature for extended periods. |
If the ice cream becomes very hard in the freezer, let it sit at room temperature for 5-10 minutes before serving to soften.
Nutritional Information
Approximate values will vary depending on ingredients, brands, and serving size.
| Nutrient | Amount per Serving |
|---|---|
| Calories | Approximately 250-300 kcal |
| Carbohydrates | Approximately 20-25g |
| Protein | Approximately 3-5g |
| Fat | Approximately 15-20g |
| Fiber | Approximately 0g |
| Sugar | Approximately 18-23g |
| Sodium | Approximately 30-50mg |
Frequently Asked Questions
Can I make this recipe ahead of time?
Yes, absolutely. The custard base can be made one to two days in advance and chilled thoroughly. In fact, chilling it overnight is recommended for the best texture when churning.
Can I substitute one main ingredient?
While substitutions are possible, they will affect the final texture and flavor. For instance, using less cream or milk might result in icier results. Egg yolks create the signature richness; replacing them entirely may change the texture significantly.
How do I know when the custard is ready?
The custard is ready when it thickens enough to coat the back of a spoon. When you run your finger through the custard on the back of the spoon, the line should hold its shape and not immediately run back together. This indicates it has reached the proper temperature without curdling.
How should I store the ice cream?
Store the finished ice cream in an airtight container in the freezer. Pressing plastic wrap or parchment paper directly onto the surface before sealing is crucial to prevent ice crystal formation and maintain creamy texture for up to two weeks.
Is this recipe good for everyday use?
This old-fashioned vanilla ice cream is a wonderful treat for special occasions or simply as an everyday comfort food. While it uses simple ingredients, it is a rich dessert and best enjoyed as part of a balanced diet. This recipe is for everyday enjoyment and is not a replacement for medical advice.
Conclusion
Making old-fashioned vanilla ice cream at home is a rewarding experience that yields a dessert far superior to most store-bought options. The pure, rich flavor and creamy texture are a testament to the beauty of simple, quality ingredients prepared with care. This recipe brings the comforting essence of classic homemade goodness right into your kitchen, creating a timeless treat everyone will love.
Print
Old-Fashioned Vanilla Ice Cream: A Timeless Homemade Delight
- Total Time: 300
- Yield: 6-8 servings 1x
- Diet: Vegetarian
Description
A creamy, classic custard-based vanilla ice cream made with just egg yolks, heavy cream, milk, sugar, and real vanilla. Rich, smooth, and nostalgic, this simple recipe creates a homemade treat perfect for topping with fruits, nuts, or pure vanilla. Chill and churn for a soft-serve texture.
Ingredients
2 cups heavy cream
1 cup whole milk
3/4 cup granulated sugar
5 large egg yolks
1 tablespoon pure vanilla extract
Instructions
In a medium saucepan, gently warm the heavy cream and whole milk over medium heat until small bubbles form around the edges
In a separate bowl, whisk together egg yolks and sugar until pale and slightly thickened
Slowly drizzle in the warmed milk mixture while continuously whisking to temper the eggs
Return the custard to the saucepan and cook over low heat, stirring constantly, until it thickens enough to coat the back of a spoon (do not boil)
Chill the custard completely for at least 4 hours
Churn in an ice cream maker according to manufacturer instructions until soft-serve consistency forms
Pour into an airtight container and freeze for 2-3 hours until firm
Notes
For an intensified vanilla flavor, steep a split vanilla bean in the warm cream before mixing
Adjust sugar to taste; reduction increases after freezing
Stir custard down the side of the pot while cooking to prevent scorching
Store frozen in an airtight container for up to 2 weeks
- Prep Time: 25
- Cook Time: 10
- Category: Desserts
- Method: Churning
- Cuisine: American
Nutrition
- Serving Size: 1/2 cup
- Calories: 280
- Sugar: 22g
- Sodium: 80mg
- Fat: 16g
- Saturated Fat: 10g
- Carbohydrates: 24g
- Fiber: 0g
- Protein: 4g
- Cholesterol: 60mg