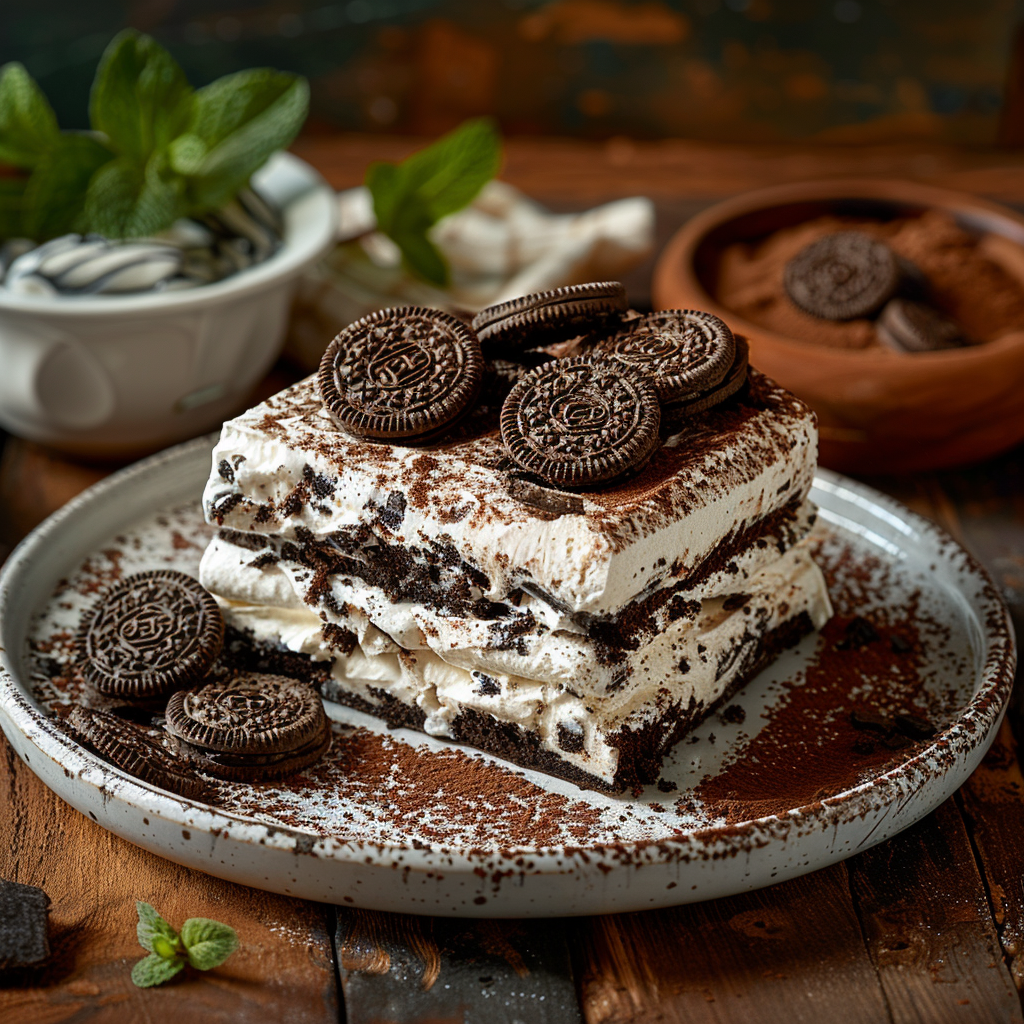
Get ready to whip up a delightful Oreo icebox cake that’s incredibly easy and perfect for any occasion. This no-bake dessert combines creamy layers with the irresistible crunch of Oreos, creating a treat that’s both nostalgic and satisfying. It’s a straightforward, comforting recipe that requires minimal effort but delivers maximum crowd-pleasing flavor, making it a wonderful addition to your collection of simple, homemade desserts. Families love it for its approachable preparation and delicious results.
Why This Recipe Works
This Oreo icebox cake is a testament to the magic of simple ingredients coming together in perfect harmony. The beauty of this recipe lies in its no-bake nature, meaning you don’t need to turn on the oven, which is a lifesaver on warm days or when you’re short on time. The layers of crushed Oreos, creamy filling, and whipped topping meld together in the refrigerator, creating a wonderfully soft, cake-like texture that’s deeply comforting.
It’s the kind of dessert that feels like a special treat without any fuss. The balance of sweet creaminess and chocolatey cookie is just right, offering a familiar yet exciting flavor profile. This recipe is truly a heartwarming, old-fashioned delight that comes together with just a few basic pantry staples and a little bit of chilling time.
Recipe Overview
| Prep Time | 20 minutes |
|---|---|
| Cook Time | 0 minutes (plus chilling time) |
| Total Time | 20 minutes plus at least 4 hours chilling |
| Servings | 8-10 |
| Difficulty | Easy |
| Category | Dessert |
| Cuisine | American, Homemade |
| Best For | Family gatherings, celebrations, warm weather |
Ingredients
Gathering the ingredients for this easy Oreo icebox cake is a breeze, as they are common pantry and refrigerator staples. You’ll find that each component plays a crucial role in creating that signature creamy texture and rich chocolate flavor.
| Ingredient | Quantity | Notes |
|---|---|---|
| Oreo Cookies | 36-40 cookies | Regular or Double Stuf, plus extra for garnish |
| Butter | 1/2 cup | Unsalted, melted |
| Cream Cheese | 8 ounces | Softened, full-fat recommended |
| Powdered Sugar | 1 cup | For sweetness and smooth texture |
| Milk | 1/2 cup | Whole milk preferred, for richness |
| Vanilla Extract | 1 teaspoon | Enhances the flavors |
| Whipped Topping | 8 ounces | Cool Whip or homemade whipped cream, thawed or ready |
The star of this dessert is, of course, the Oreo cookies. Their chocolatey goodness and satisfying crunch are essential. The melted butter helps bind the crushed cookies for the crust, creating a firm base. Softer cream cheese, when blended with powdered sugar and milk, forms the smooth, luscious filling that complements the cookies perfectly. The vanilla extract adds a touch of warmth, and the whipped topping brings an airy lightness that makes the entire cake melt in your mouth.
Step-by-Step Instructions
Follow these simple steps to create your delicious Oreo icebox cake. The process is designed to be straightforward, ensuring great results every time.
Prepare the Oreo Crust
- Crush the Oreo cookies until they form fine crumbs. You can do this by placing them in a zip-top bag and crushing them with a rolling pin, or by using a food processor.
- In a medium bowl, combine the Oreo crumbs with the melted butter. Stir until the crumbs are evenly moistened and resemble wet sand.
- Press the buttered crumbs firmly into the bottom of a 9×13 inch baking dish or a springform pan to form an even crust. You can use the bottom of a glass or measuring cup to help create a firm layer.
Make the Creamy Filling
- In a large bowl, beat the softened cream cheese until it is smooth and creamy.
- Gradually beat in the powdered sugar until well combined and no lumps remain.
- Slowly add the milk and vanilla extract, beating until the mixture is smooth and slightly thickened.
- Gently fold in the thawed whipped topping until just combined. Be careful not to overmix, as this can deflate the whipped topping.
Assemble and Chill the Cake
- Spread the creamy filling evenly over the prepared Oreo crust.
- Arrange whole or halved Oreo cookies on top of the filling for decoration.
- Cover the baking dish tightly with plastic wrap or a lid.
- Chill the cake in the refrigerator for at least 4 hours, or until firm and set. Overnight chilling often yields the best texture as the flavors meld.
Granny Tips for Perfect Results
Here are a few little secrets I’ve learned over the years to make your Oreo icebox cake truly special:
- Soften Your Cream Cheese Completely: Cold cream cheese will result in a lumpy filling. Let it sit at room temperature for about an hour before you start.
- Don’t Over-Crush the Oreos for the Crust: A few slightly larger crumbs in the crust add a nice texture. For the filling, finer crumbs blend better.
- Fold Gently: When adding the whipped topping, use a gentle folding motion to keep the filling light and airy, just like a cloud.
- Chill is Key: Be patient with the chilling time. This is where the magic happens, allowing the layers to set and the flavors to meld into that perfect cake-like consistency.
- Fresh and Simple Garnishes: A few extra Oreos, some fresh berries, or a drizzle of chocolate sauce can elevate the presentation beautifully.
- Use Full-Fat Ingredients: For the richest flavor and best texture, I always recommend using full-fat cream cheese and whole milk.
Common Mistakes to Avoid
Even the simplest recipes can have a few pitfalls. Here’s what to watch out for to ensure your Oreo icebox cake turns out just right:
- Mistake: Lumpy Cream Cheese Filling. This happens when the cream cheese isn’t properly softened. Ensure it’s at room temperature and beat it until completely smooth before adding other ingredients.
- Mistake: Soggy Crust. If the Oreos get too wet or aren’t pressed firmly enough, the crust can become soft and fall apart. Make sure to mix the crumbs with butter thoroughly and press them down compact.
- Mistake: Deflated Filling. Overmixing after adding the whipped topping can cause it to lose volume. Fold it in gently and stop as soon as it’s incorporated.
- Mistake: Impatience with Chilling. Rushing the chilling time means the cake won’t set properly. Give it the recommended minimum of 4 hours, and preferably longer for the best texture.
- Mistake: Over-sweetened Filling. The sweetness of Oreos can add up. Taste your filling before adding all the whipped topping, and adjust sugar if needed, though the given amount is usually balanced.
Variations and Substitutions
You can easily customize this Oreo icebox cake to suit your preferences or what you have on hand. Here are some delightful ideas:
| Variation or Ingredient | Substitution | Result |
|---|---|---|
| Oreo Cookies | Chocolate graham crackers or chocolate wafers | A slightly different, but still delicious, cookie base. |
| Cream Cheese Filling | Instant vanilla pudding mix (prepared according to package directions, using less milk) mixed with whipped topping | A lighter, fluffier, and quicker-to-set filling. |
| Oreo Cookies | Mint Oreos or Peanut Butter Oreos | Adds a fun flavor twist that pairs wonderfully with the creaminess. |
| Whipped Topping | Homemade sweetened whipped cream (whip heavy cream with a little sugar and vanilla) | A fresher, richer flavor and texture. Ensure it’s whipped to stiff peaks. |
| Add-ins | Chopped chocolate chips, mini marshmallows, or chopped nuts folded into the filling | Adds extra texture and flavor layers. |
Serving Suggestions and Pairings
This Oreo icebox cake is best served chilled, straight from the refrigerator. It’s a wonderful dessert for family dinners, birthday parties, potlucks, or simply when you need a sweet pick-me-up. The cool, creamy texture makes it especially delightful on warmer days or after a hearty meal.
Garnish the top with extra crushed Oreos, a few whole cookies, fresh berries like raspberries or strawberries, or a drizzle of chocolate sauce for an extra touch of indulgence. If you’re looking for a perfect pairing, consider a simple glass of milk or a warm cup of Ginger Tea for Nausea or any of our other soothing drinks, depending on the occasion.
Storage and Reheating
Proper storage is key to maintaining the delightful texture of your Oreo icebox cake.
| Method | Duration | Instructions |
|---|---|---|
| Refrigerator | 3-4 days | Cover the dish tightly with plastic wrap or an airtight lid. The cake will remain moist and delicious. |
| Freezer | Up to 1 month | Wrap the cake very tightly in plastic wrap, then in aluminum foil. Thaw in the refrigerator overnight before serving. The texture may soften slightly upon thawing. |
This cake is not suitable for reheating. It is meant to be enjoyed cold or slightly chilled.
Nutritional Information
Approximate values will vary depending on ingredients, brands, and serving size.
| Nutrient | Amount per Serving |
|---|---|
| Calories | Approximately 350-400 kcal |
| Carbohydrates | Approximately 35-40g |
| Protein | Approximately 4-6g |
| Fat | Approximately 20-25g |
| Fiber | Approximately 1-2g |
| Sugar | Approximately 25-30g |
| Sodium | Approximately 150-200mg |
Frequently Asked Questions
Can I make this recipe ahead of time?
Yes, absolutely! This Oreo icebox cake is best made ahead of time. Chilling is essential for the layers to set and meld together, creating that lovely cake-like texture. It can be made up to 2 days in advance and stored in the refrigerator.
Can I substitute one main ingredient?
You can substitute the Oreos with other cookies such as chocolate wafers or graham crackers for a different flavor profile. For a lighter filling, you can reduce the cream cheese and increase the whipped topping, or use a pudding-based filling as suggested in the variations. Always ensure ingredients are softened or properly prepared for the best results.
How do I know when it is ready?
Your Oreo icebox cake is ready when the filling is firm to the touch and the cookies are softened. When you gently press the surface, it should feel set, and the edges should hold their shape. Overnight chilling usually ensures it’s perfectly set.
How should I store it?
Store any leftovers tightly covered in the refrigerator. An airtight container or plastic wrap pressed directly onto the surface will help keep it fresh for up to 3-4 days. This recipe is not a remedy and is meant for everyday comfort.
Is this recipe good for everyday use?
While delicious, this Oreo icebox cake is a sweet treat, more suited for special occasions or weekend enjoyment rather than every single day. It’s a comforting dessert that fits perfectly into a balanced lifestyle when enjoyed in moderation. This recipe is for everyday comfort and is not a replacement for medical advice.
Conclusion
This easy Oreo icebox cake is a delightful, no-bake dessert that’s guaranteed to be a hit. Its simple preparation, creamy texture, and classic chocolate-cookie flavor make it a beloved treat for all ages. Whether you’re a seasoned baker or just starting, this old-fashioned recipe offers rewarding results with minimal effort. Enjoy this comforting, homemade dessert anytime you crave a sweet slice of happiness.
Print
Oreo Icebox Cake
- Total Time: 280
- Yield: 8-10 servings 1x
- Diet: Vegetarian
Description
A no-bake, creamy dessert combining crushed Oreos, vanilla-flavored cream cheese filling, and whipped topping for a nostalgic, crowd-pleasing treat. Perfect for family gatherings or warm-weather celebrations.
Ingredients
36–40 Oreo Cookies
1/2 cup (1 stick) unsalted butter, melted
8 ounces full-fat cream cheese, softened
1 cup powdered sugar
1/2 cup whole milk
2 cups whipped cream (or equal parts milk, sugar, and gelatin for halal version)
Instructions
Pulverize Oreo cookies until fine crumbs form.
Mix with melted butter to create a dough.
Press into a 9×5-inch loaf pan or springform to form a crust.
Beat cream cheese and powdered sugar until smooth.
Add milk for a silky texture.
Fold in whipped cream (or halal alternative) until fluffy.
Layer over the crust.
Chill at least 4 hours before slicing into wedges.
Notes
For halal dessert, substitute whipped cream with a halal-certified topping.
Use room-temperature cream cheese for smooth blending.
Chill longer for firmer texture.
Store covered in fridge for up to 48 hours.
- Prep Time: 20
- Category: Desserts
- Method: Refrigeration
- Cuisine: American
Nutrition
- Serving Size: 1 sturdy serving (approx. 4 oz)
- Calories: 450
- Sugar: 30g
- Sodium: 500mg
- Fat: 20g
- Saturated Fat: 10g
- Carbohydrates: 45g
- Fiber: 2g
- Protein: 4g
- Cholesterol: 60mg