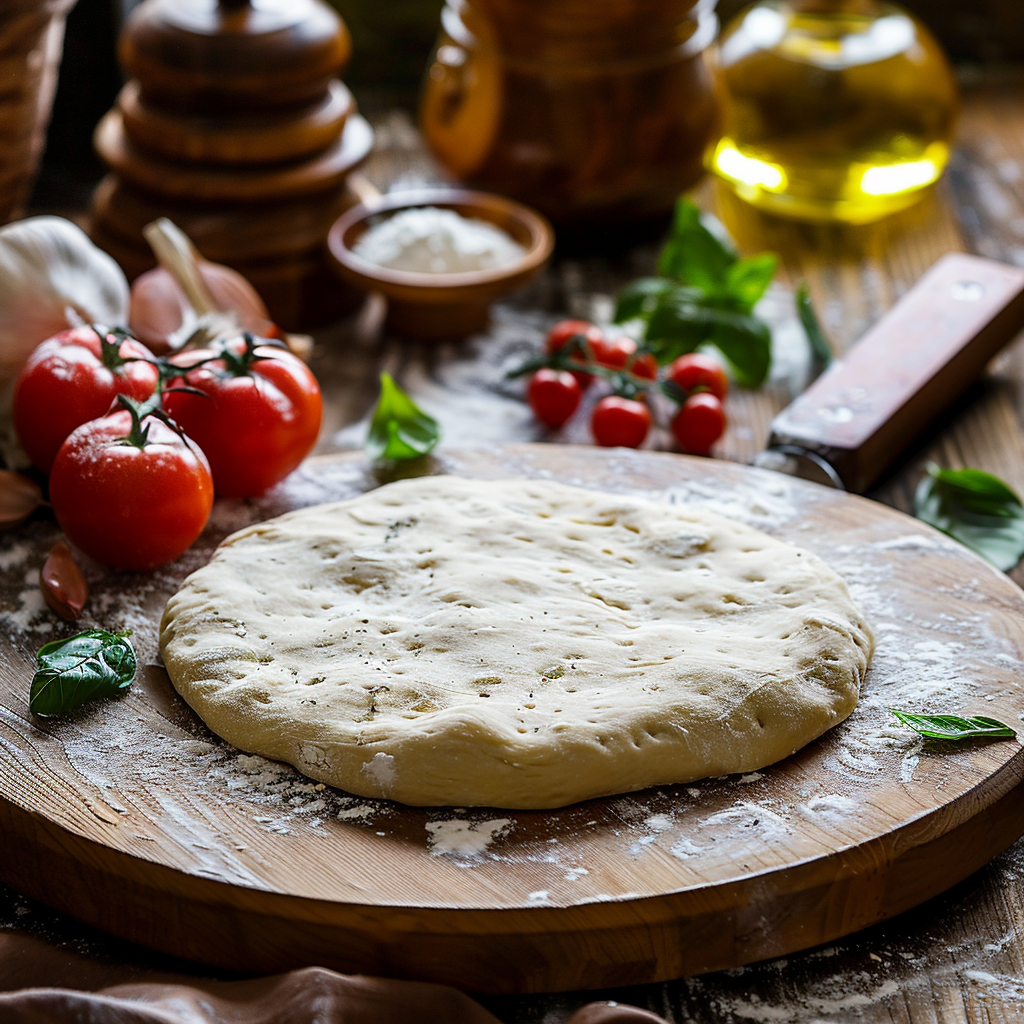
Making your own thin crust pizza dough at home is a wonderfully rewarding experience, filling your kitchen with a comforting aroma and providing the perfect base for your favorite toppings. This easy recipe yields a delightfully crisp crust that rivals your favorite pizzerias. It’s simple enough for a weeknight dinner but special enough for entertaining guests. Get ready to enjoy delicious, homemade pizza tailored exactly to your family’s tastes.
Why This Recipe Works
This recipe is designed to give you that perfect thin and crispy crust every time. The balance of flour, water, yeast, and a touch of sugar creates a dough that’s easy to handle and bakes up beautifully. A proper proofing time allows the gluten to develop, giving the dough structure and that signature chew, while the small amount of olive oil keeps it from drying out in the oven. It’s an old-fashioned approach that yields fantastic results.
The magic happens in how quickly this dough bakes at a high temperature. This helps to evaporate moisture from the surface, creating that sought-after crispiness. It’s a simple recipe rooted in basic baking principles, making it accessible for beginners and reliable for experienced home cooks.
This thin crust pizza dough is a versatile foundation for countless culinary creations.
Recipe Overview
| Prep Time | 30 minutes + 1 hour rising |
|---|---|
| Cook Time | 10-15 minutes |
| Total Time | 1 hour 45 minutes |
| Servings | 2 medium pizzas (about 8 slices each) |
| Difficulty | Easy |
| Category | Main Dish |
| Cuisine | American, Homemade |
| Best For | Family Dinners, Pizza Nights, Entertaining |
Ingredients
Gather these simple ingredients for a classic homemade thin crust pizza dough.
| Ingredient | Quantity | Notes |
|---|---|---|
| All-purpose flour | 3 cups | plus more for dusting |
| Active dry yeast | 1 packet (2 ¼ teaspoons) | or instant yeast |
| Warm water | 1 cup | about 105-115°F (40-46°C) |
| Granulated sugar | 1 teaspoon | feeds the yeast |
| Salt | 1 ½ teaspoons | for flavor |
| Olive oil | 2 tablespoons | plus more for greasing bowl |
The most crucial ingredients here are good quality all-purpose flour and active dry yeast. The flour provides the structure, while the yeast gives the dough its lift and characteristic flavor. Warm water is essential for activating the yeast, and sugar provides a little food to get it started quickly. Salt is key for flavor and also helps control the yeast’s activity. A touch of olive oil adds a hint of richness and helps create a tender, yet crisp, crust.
Step-by-Step Instructions
Follow these simple steps to create perfect thin crust pizza dough.
Activate the Yeast
- In a large mixing bowl, combine the warm water and sugar. Stir gently to dissolve the sugar.
- Sprinkle the active dry yeast over the water. Let it sit undisturbed for 5-10 minutes until it becomes foamy and bubbly; this confirms the yeast is active. If using instant yeast, you can skip this step and add it directly to the dry ingredients.
Mix the Dough
- Add the salt and 2 tablespoons of olive oil to the foamy yeast mixture.
- Gradually add the 3 cups of all-purpose flour to the wet ingredients. Mix with a spoon or spatula until a shaggy dough begins to form.
- Turn the dough out onto a lightly floured surface. Knead for 8-10 minutes until the dough is smooth, elastic, and no longer sticky. If the dough is too sticky, add a little more flour, one tablespoon at a time.
First Rise (Proofing)
- Lightly grease a clean, large bowl with a little olive oil.
- Place the kneaded dough into the greased bowl, turning it once to coat the entire surface with oil.
- Cover the bowl tightly with plastic wrap or a clean kitchen towel.
- Let the dough rise in a warm place for about 1 hour, or until it has doubled in size.
Shape and Bake
- Once the dough has risen, punch it down gently to release the air.
- Divide the dough in half for two medium pizzas.
- On a lightly floured surface or a piece of parchment paper, stretch or roll each piece of dough into your desired thin pizza shape (round or rectangular). Aim for about 1/8 to 1/4 inch thickness.
- Transfer the shaped dough to a pizza peel dusted with cornmeal or onto a baking sheet.
- Preheat your oven to a high temperature, typically 450-500°F (230-260°C), with a pizza stone or baking sheet inside if you have one.
- Top your pizza dough with your favorite sauce, cheese, and toppings.
- Carefully slide the pizza onto the preheated pizza stone or place the baking sheet into the oven.
- Bake for 10-15 minutes, or until the crust is golden brown and the cheese is bubbly and melted.
Granny Tips for Perfect Results
Here are a few little secrets from my kitchen to help you achieve the best thin crust pizza dough.
- Use a thermometer for water temperature: Water that is too hot can kill the yeast, and water that is too cold won’t activate it properly. Aim for that sweet spot between 105-115°F (40-46°C).
- Don’t rush the rising time: Allowing the dough to properly double in size is crucial for texture and flavor development. A warm, draft-free place helps this process.
- High oven temperature is key: A very hot oven is essential for achieving a crispy thin crust. It mimics the heat of a professional pizza oven.
- Preheating your baking surface: If using a pizza stone or baking steel, preheating it in the oven ensures a crisp bottom crust right from the start.
- Handle dough gently after rising: Punching down the dough releases large air bubbles, creating a more even texture. Avoid overworking it at this stage.
- Stretching vs. Rolling: While rolling is easier, stretching the dough by hand can give it a more rustic texture. Work from the center outwards.
- Don’t overload with toppings: Too many toppings can make the crust soggy. Less is often more for a perfect thin crust pizza.
Common Mistakes to Avoid
Here are some common pitfalls to watch out for when making thin crust pizza dough.
- Mistake: Using water that’s too hot or too cold for the yeast. This can result in dough that doesn’t rise at all or rises poorly. Always check the water temperature and strive for warmth, not heat.
- Mistake: Not kneading the dough long enough. Insufficient kneading means weak gluten development, leading to a tough or crumbly crust that won’t stretch well. Knead until the dough is smooth and elastic.
- Mistake: Over-flouring the dough. Adding too much flour during kneading or shaping can result in a dry, tough crust. Use just enough flour to prevent sticking.
- Mistake: Not letting the dough rise sufficiently. A dough that hasn’t doubled in size will be dense and heavy. Ensure it has adequate time in a warm environment to rise properly.
- Mistake: Overcrowding the pizza with toppings. This is a common culprit for soggy crusts. Distribute toppings evenly and avoid piling them too high.
Variations and Substitutions
Feel free to customize your thin crust pizza dough with these easy variations.
| Variation or Ingredient | Substitution | Result |
|---|---|---|
| All-Purpose Flour | Bread Flour | Chewier crust with more structure. May require slightly more water. |
| Active Dry Yeast | Instant Yeast | Can be added directly with dry ingredients, no need to proof first. |
| Warm Water | Plant-based Milk (e.g., unsweetened almond or soy) | Adds a subtle richness; ensure it’s warm, not hot. |
| Olive Oil | Melted Butter or Vegetable Oil | Slightly different flavor profile, but works well for crispiness. |
| Add Herbs | 1-2 tsp dried Italian seasoning or garlic powder to flour | Infuses the dough with aromatic flavor. |
| Whole Wheat Flour | Substitute 1 cup of AP flour with whole wheat flour | Nutty flavor and slightly denser texture. |
Serving Suggestions and Pairings
Homemade thin crust pizza is perfect for almost any occasion and pairs wonderfully with many sides.
Serve your freshly baked pizza piping hot. It’s ideal for a casual family dinner, a fun Friday night treat, or a crowd-pleasing appetizer when cut into smaller squares. Garnish with fresh basil, a sprinkle of red pepper flakes, or a drizzle of olive oil. For a complete meal, consider serving it alongside a refreshing Low Carb Cucumber Agua Fresca to balance the richness, or a simple Easy Italian Antipasto Salad for a lovely contrast. A bowl of Gut Healing Bone Broth can also be a comforting starter on a cooler evening.
Storage and Reheating
Here’s how to store any leftover thin crust pizza dough or baked pizza.
| Method | Duration | Instructions |
|---|---|---|
| Refrigerate (uncooked dough) | 1-2 days | Place dough in an oiled airtight container or zip-top bag. May need to come to room temperature before shaping. |
| Freeze (uncooked dough) | 2-3 months | Wrap dough tightly in plastic wrap, then in foil or a freezer bag. Thaw overnight in the refrigerator before using. |
| Refrigerate (baked pizza) | 3-4 days | Store cooled pizza slices in an airtight container or wrapped securely. |
| Reheat (baked pizza) | N/A | For best crispiness, reheat slices in a preheated oven or toaster oven at 350°F (175°C) until warmed through. A skillet on low heat also works. |
Nutritional Information
Approximate values will vary depending on ingredients, brands, and serving size.
| Nutrient | Amount per Serving (1/8th of pizza dough, before toppings) |
|---|---|
| Calories | Approximately 180-200 kcal |
| Carbohydrates | Approximately 30-35g |
| Protein | Approximately 5-7g |
| Fat | Approximately 4-6g |
| Fiber | Approximately 1-2g |
| Sugar | Approximately 1-2g |
| Sodium | Approximately 300-400mg |
Frequently Asked Questions
Can I make this recipe ahead of time?
Yes, you can certainly make the thin crust pizza dough ahead of time. Once the dough has completed its first rise, you can refrigerate it for up to 2 days or freeze it for up to 3 months. Make sure to let it come to room temperature before shaping and baking for the best results.
Can I substitute one main ingredient in this dough recipe?
You can often make substitutions, such as using bread flour for a chewier crust or instant yeast instead of active dry. However, significant changes, like substituting the type of liquid or the amount of flour significantly, might alter the dough’s texture and handling properties. If you’re new to baking, sticking to the recipe’s main ingredients is often the best approach.
How do I know when my thin crust pizza dough is ready to bake?
For the dough itself, it’s ready after it has risen and doubled in size in a warm place. For the baked pizza, the crust should be golden brown and crisp, often with slightly raised edges, and the cheese should be melted and bubbly. This typically takes 10-15 minutes in a hot oven.
How should I store leftover uncooked dough?
Store uncooked thin crust pizza dough in an airtight container or a zip-top bag, lightly oiled to prevent sticking. It can be kept in the refrigerator for up to 2 days. If freezing, wrap it securely in plastic wrap and then in foil to prevent freezer burn. Always thaw frozen dough overnight in the refrigerator before using.
Is this thin crust pizza dough good for everyday use?
Absolutely! This easy homemade thin crust pizza dough recipe is perfect for regular pizza nights or weeknight dinners. It uses common pantry ingredients and is simple enough to make frequently. Enjoying homemade pizza is a comforting and customizable meal option for any day.
Conclusion
Crafting your own thin crust pizza dough at home is a simple joy that leads to delicious results. This easy recipe delivers a perfectly crispy, golden crust that forms a wonderful foundation for all your favorite pizza creations. It’s a fundamental skill for any home cook looking to elevate their pizza game with a comforting, homemade touch. Give this recipe a try, and enjoy a truly satisfying slice!
Print
The Best Thin Crust Pizza Dough Recipe: Easy & Crispy Homemade Pizza
- Total Time: 105
- Yield: 2 medium pizzas (16 slices total) 1x
- Diet: Vegetarian
Description
This homemade thin crust pizza dough recipe delivers a crisp, flavorful base perfect for family dinners or entertaining. Easy to make with simple ingredients, it rivals pizzeria crusts and bakes quickly at high heat for optimal texture.
Ingredients
3 cups all-purpose flour
1 packet (2 ¼ teaspoons) active dry yeast (or instant yeast)
1 cup warm water (105-115°F / 40-46°C)
1 teaspoon granulated sugar
1 ½ teaspoons salt
2 tablespoons olive oil (plus more for greasing bowl)
Instructions
In a large bowl, combine warm water, sugar, and yeast. Let sit for 5-10 minutes until frothy.
Add flour, salt, and 2 tablespoons olive oil. Mix until a dough forms.
Knead on a floured surface for 5-7 minutes until smooth and elastic.
Place dough in an oiled bowl, cover with a towel, and let rise for 1 hour until doubled in size.
Punch down the dough, divide into 2 portions, and roll out into thin circles on a floured surface.
Place on a greased baking sheet or pizza stone. Top with sauce, cheese, and desired toppings.
Bake at 450°F (230°C) for 10-15 minutes until golden and crisp.
Notes
For best results, use cold water if the dough is too sticky.
Preheat oven and baking sheet for 10-15 minutes to enhance crispiness.
Substitute instant yeast for active dry yeast if preferred (no need to proof separately).
- Prep Time: 30
- Cook Time: 13
- Category: Bread & Baking
- Method: Baking
- Cuisine: American, Homemade
Nutrition
- Serving Size: 1 slice
- Calories: 130
- Sugar: 0.3g
- Sodium: 380mg
- Fat: 2g
- Saturated Fat: 0.3g
- Carbohydrates: 21g
- Fiber: 1g
- Protein: 4g
- Cholesterol: 0mg