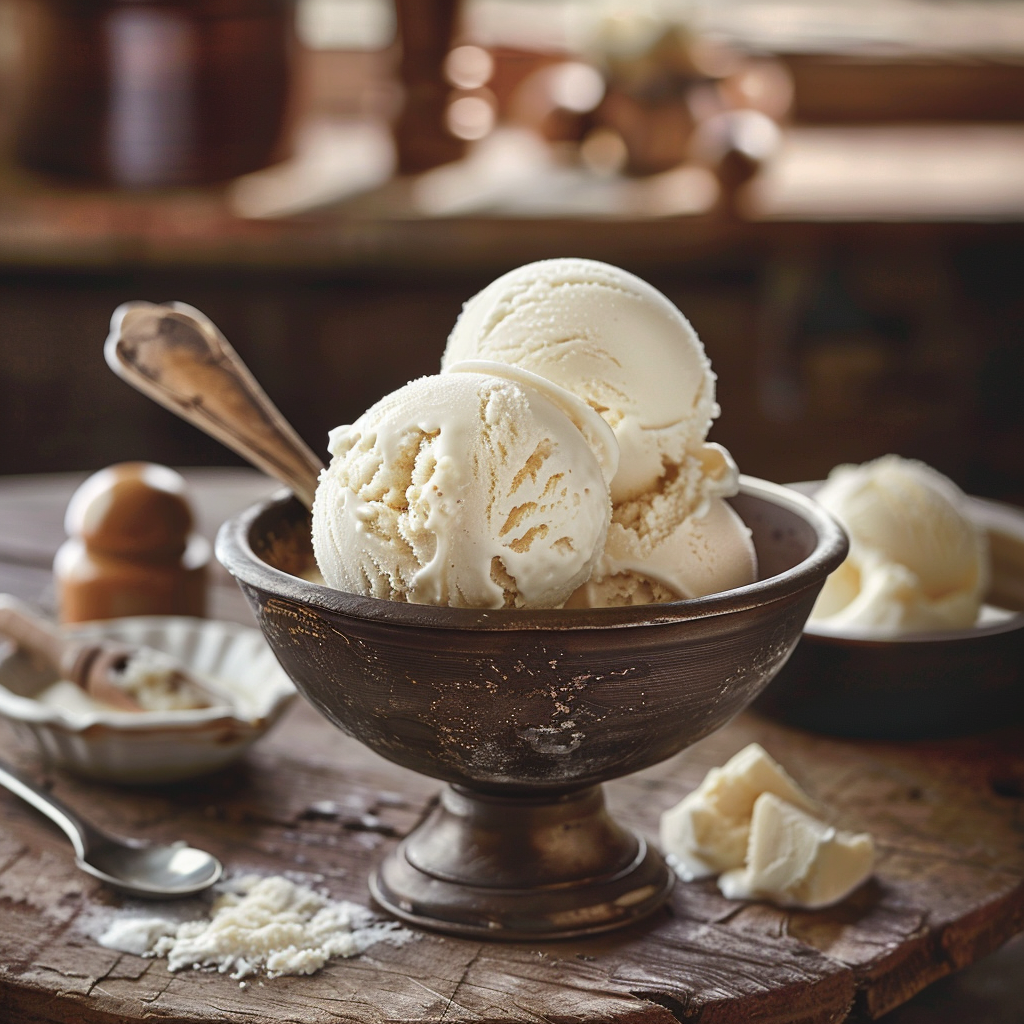
Creating delicious homemade ice cream doesn’t have to be complicated, and this easy condensed milk vanilla ice cream recipe is proof! It’s a wonderfully simple, old-fashioned way to get that creamy, dreamy texture without needing an ice cream maker. The secret lies in the sweetened condensed milk, which adds sweetness and incredible smoothness. Perfect for a warm afternoon or as a sweet finale to any meal, this recipe is sure to become a family favorite that brings smiles all around.
Why This Recipe Works
This recipe is a bit of kitchen magic because it simplifies the ice cream-making process dramatically. Traditional ice cream requires chilling a custard base and then churning it, which can take time and special equipment. But by using sweetened condensed milk, we get much of the sugar and thickness already in place. When combined with heavy cream, it creates a stable base that freezes beautifully smooth.
The beauty of this condensed milk vanilla ice cream is its adaptability. It’s incredibly forgiving, and the velvety texture achieved with just a few ingredients is truly satisfying. This makes it an ideal recipe for beginners or anyone looking for a quick, comforting treat without the fuss.
Recipe Overview
| Prep Time | 15 minutes |
|---|---|
| Cook Time | 0 minutes (plus freezing time) |
| Total Time | 15 minutes + 6-8 hours freezing |
| Servings | 6-8 servings |
| Difficulty | Easy |
| Category | Dessert |
| Cuisine | American, Grandma-style |
| Best For | Desserts, parties, warm weather treats |
Ingredients
Gathering the ingredients for this simple condensed milk vanilla ice cream is a breeze, as you likely have most of them in your pantry already.
| Ingredient | Quantity | Notes |
|---|---|---|
| Sweetened Condensed Milk | 1 can (14 ounces) | Full fat is best for creaminess. |
| Heavy Cream | 2 cups (16 ounces) | Very cold. For a lighter version, consider half-and-half, but it will be less rich. |
| Vanilla Extract | 2 teaspoons | Use pure vanilla extract for the best flavor. |
| Salt | Pinch | Enhances sweetness and balances flavors. |
The star players here are the sweetened condensed milk and the heavy cream. The condensed milk provides sweetness and helps prevent ice crystals from forming, leading to that wonderful smooth texture. The cold heavy cream whips up to incorporate air, making the ice cream light and fluffy. Don’t skip the pinch of salt; it might seem odd in ice cream, but it truly makes the flavors sing!
Step-by-Step Instructions
Follow these simple steps to create a delightful batch of easy homemade ice cream.
Prepare the Base
- Pour the chilled sweetened condensed milk into a large mixing bowl.
- Add the pure vanilla extract and a pinch of salt to the condensed milk.
- Whisk these ingredients together until they are well combined and smooth.
Whip the Cream
- In a separate, chilled large bowl, pour the very cold heavy cream.
- Using an electric mixer (or a whisk and a lot of arm power!), whip the cream until medium-stiff peaks form. This means when you lift the beater, the cream holds its shape but the tips might curl over slightly.
Combine and Freeze
- Gently fold about one-third of the whipped cream into the condensed milk mixture using a spatula. This lightens the condensed milk mixture, making it easier to incorporate the rest of the cream.
- Add the remaining whipped cream to the condensed milk mixture and continue to fold gently until just combined. Be careful not to overmix, which can deflate the whipped cream.
- Pour the ice cream mixture into a freezer-safe container, such as a loaf pan or a plastic container with a lid.
- Cover the container tightly to prevent ice crystals from forming.
- Freeze for at least 6 to 8 hours, or until firm. For best results, stir the ice cream once or twice during the first 2 hours of freezing to help ensure a smoother texture.
Granny Tips for Perfect Results
Here are a few of my tried-and-true tips to make your condensed milk vanilla ice cream absolutely perfect every time.
- Chill Everything: Make sure your heavy cream, mixing bowl, and beaters are very cold before you start whipping the cream. This helps the cream whip up faster and achieve better volume.
- Don’t Over-Whip: Whipping the cream too much can turn it into butter. Stop when you reach medium-stiff peaks.
- Fold Gently: When combining the whipped cream and condensed milk base, use a folding motion rather than vigorous stirring. This preserves the air incorporated into the cream, keeping your ice cream light.
- Freeze Fast: The faster your ice cream freezes, the smaller the ice crystals will be, resulting in a smoother texture. Ensure your freezer is set to a cold temperature.
- Stirring Helps: While not strictly necessary, giving the ice cream a stir with a fork or whisk every hour for the first few hours of freezing can significantly improve the final texture and prevent large ice crystals.
- Flavor Boost: For an even richer vanilla flavor, consider adding half a vanilla bean, scraped of its seeds, along with the extract.
Common Mistakes to Avoid
Even with a simple recipe, a few common missteps can affect the outcome. Learning to avoid these will lead to success.
- Mistake: Using warm ingredients. Warm cream won’t whip properly, leading to a flat, dense ice cream. Always ensure your cream and bowls are very cold.
- Mistake: Overmixing when folding. Overmixing deflates the whipped cream, resulting in a denser, icier ice cream rather than a light and fluffy one. Fold gently and stop as soon as it’s just combined.
- Mistake: Not freezing long enough. An under-frozen ice cream will be too soft and soupy. Allow at least 6 to 8 hours for it to firm up completely.
- Mistake: Not covering tightly. An uncovered or loosely covered container will allow freezer odors to transfer and moisture to escape, leading to ice crystals and a less pleasant texture. Use a lid or plastic wrap pressed directly onto the surface.
Variations and Substitutions
This basic recipe is a perfect canvas for all sorts of delicious additions and adjustments.
| Variation or Ingredient | Substitution | Result |
|---|---|---|
| Richer Vanilla Flavor | Add seeds from 1/2 vanilla bean | More intense, nuanced vanilla aroma and taste. |
| Chocolate Swirl | Swirl in melted chocolate or chocolate syrup after the first hour of freezing. | A beautiful marbled effect and rich chocolate flavor. |
| Fruity Swirl | Swirl in fruit puree (like raspberry, strawberry, or mango) after the first hour of freezing. | A delightful fruity twist, great with vanilla. |
| Cookies and Cream | Fold in crushed chocolate sandwich cookies before freezing. | A classic favorite with crunchy cookie bits. |
| Lighter Ice Cream | Use half-and-half instead of heavy cream for one of the cups. | A slightly less rich and denser texture, but still good. |
| Mint Chocolate Chip | Add 1/4 teaspoon peppermint extract along with vanilla, and fold in mini chocolate chips before freezing. | A refreshing minty flavor with chocolatey surprises. |
Serving Suggestions and Pairings
This luscious vanilla ice cream is perfect served chilled on its own or as a delightful accompaniment to your favorite desserts.
Serve it scoop by scoop in chilled bowls. It’s wonderful alongside warm fruit crumbles, slices of apple pie, or brownies. Drizzles of warm caramel or chocolate sauce are always a welcome addition. For a simple treat, pair a scoop with a glass of Ocean Blue Mojito Lemonade Sugar Free and non alcoholic or a warm cup of Ginger Tea for Nausea: with 5 Powerful Benefits.
Storage and Reheating
Proper storage will keep your homemade ice cream tasting its best.
| Method | Duration | Instructions |
|---|---|---|
| Refrigerator | Not recommended | Ice cream will melt. |
| Freezer (Airtight Container) | 1-2 weeks | Store in a freezer-safe container with a tight-fitting lid. Pressing plastic wrap directly onto the surface of the ice cream before putting on the lid can help prevent ice crystals. If it becomes too hard to scoop, let it sit at room temperature for 5-10 minutes. |
Nutritional Information
Approximate values will vary depending on ingredients, brands, and serving size.
| Nutrient | Amount per Serving |
|---|---|
| Calories | Approximately 200-250 calories |
| Carbohydrates | Approximately 20-25g |
| Protein | Approximately 3-4g |
| Fat | Approximately 12-15g |
| Fiber | 0g |
| Sugar | Approximately 20-25g |
| Sodium | Approximately 20-30mg |
Frequently Asked Questions
Can I make this recipe ahead of time?
Yes, you can absolutely make this ice cream ahead of time. It needs at least 6 to 8 hours to freeze completely firm, and it stores well in the freezer for up to 2 weeks when kept in an airtight container.
Can I substitute sweetened condensed milk?
Using sweetened condensed milk is key to this recipe’s texture and sweetness. Substituting it can significantly alter the outcome, making it icier or less sweet. It’s best to stick with sweetened condensed milk for this specific method.
How do I know when the ice cream is ready to serve?
The ice cream is ready when it is firm enough to scoop. It will typically take 6 to 8 hours in the freezer. If it freezes too hard, simply let it sit on the counter for about 5 to 10 minutes to soften slightly before scooping.
How should I store homemade ice cream?
Store your condensed milk vanilla ice cream in a freezer-safe container with a tight-fitting lid. For best results, press a piece of parchment or wax paper directly onto the surface of the ice cream to minimize ice crystal formation before sealing the container.
Is this recipe good for everyday use?
While this easy condensed milk vanilla ice cream is a delightful treat for any occasion, it is quite rich. It’s perfect for family gatherings, special desserts, or when you simply crave a comforting homemade scoop. This recipe is for everyday comfort and is not a replacement for medical advice.
Conclusion
This easy condensed milk vanilla ice cream recipe offers a wonderfully smooth and creamy result with minimal effort. It’s a fantastic way to enjoy classic vanilla ice cream made right in your own kitchen, proving that delicious frozen desserts don’t require a fancy machine. Embrace this simple, comforting recipe and enjoy a scoop of homemade happiness anytime you like!
Print
The Easiest Condensed Milk Vanilla Ice Cream Recipe
- Total Time: 480
- Yield: 1.5 quarts (6-8 servings) 1x
- Diet: Vegetarian
Description
This minimalist no-churn vanilla ice cream uses sweetened condensed milk and heavy cream for a velvety, no-ice-crystal texture. Requires no ice cream maker and freezes perfectly for a classic, creamy homemade treat.
Ingredients
1 can (14 ounces) sweetened condensed milk, full fat
2 cups (16 ounces) heavy cream, very cold
2 teaspoons pure vanilla extract
Pinch of salt
Instructions
In a large mixing bowl, vigorously whisk sweetened condensed milk, vanilla extract, and salt until well combined.
In a separate bowl, use a whisk or hand mixer to whip the cold heavy cream until stiff peaks form.
Gently fold the whipped cream into the sweetened condensed milk mixture using a spatula until fully incorporated.
Stir in any flavor variations if desired (such as chocolate chips, nuts, or ground cinnamon).
Transfer the mixture to an airtight container and freeze for 6-8 hours or until firm.
Notes
Use a full-fat sweetened condensed milk for optimal creaminess
Ensure heavy cream is chilled before whipping
For a lighter version, substitute 1 cup dark chocolate in lieu of cream and use whole milk (texture will differ)
Store in airtight containers with plastic wrap pressed directly on the surface to prevent ice crystals
- Prep Time: 15
- Category: Desserts
- Method: Freezing
- Cuisine: American
Nutrition
- Serving Size: 1/6 quart (80g)
- Calories: 320
- Sugar: 34g
- Sodium: 85mg
- Fat: 17g
- Saturated Fat: 11g
- Carbohydrates: 45g
- Fiber: 0g
- Protein: 8g
- Cholesterol: 90mg